Mein Warenkorb
0
$0.00
Ihr Warenkorb ist derzeit leer

You can use the skill of leatherworking to make everything from useful things to beautiful art. Start-up costs are reasonable, and learning the basics and using them on more complicated projects is easy. Leather can be used to make shoes, car seats, clothes, footballs, bags, purses, books, furniture, etc. Here, we'll discuss how to start working with Leather and what you need to set up.
Leatherworking refers to the process of creating items from Leather. You can use your imagination here. Everything from a hat to a camera strap, a belt to a watch band, and everything in between.
From the time of the Old West through the culture of the 1950s and beyond, Leather has always played a significant role in design and practicality. The durability, longevity, and enhanced beauty that comes with age make it a favorite for coats and other apparel and accessories. We treat everything made of Leather with the respect it deserves because we know it will serve us well for many years if we do. It is not quick fashion.
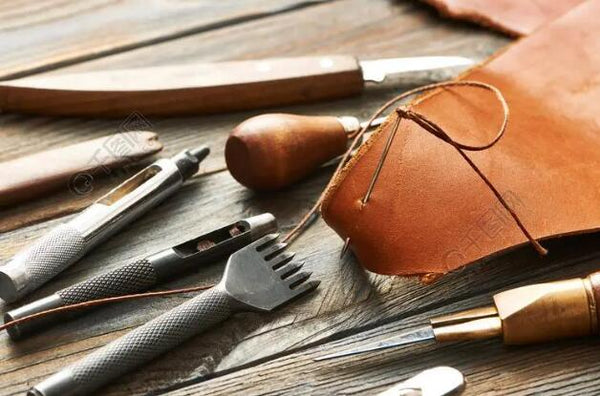
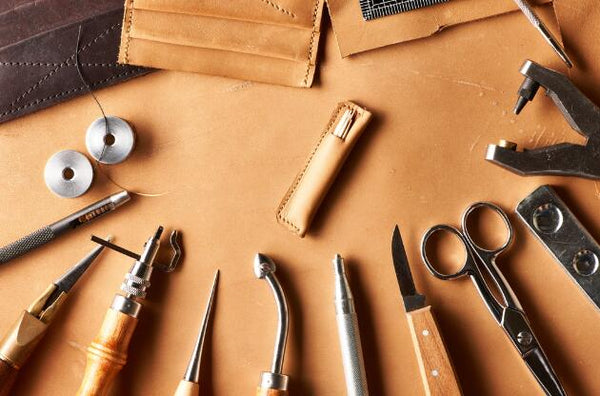
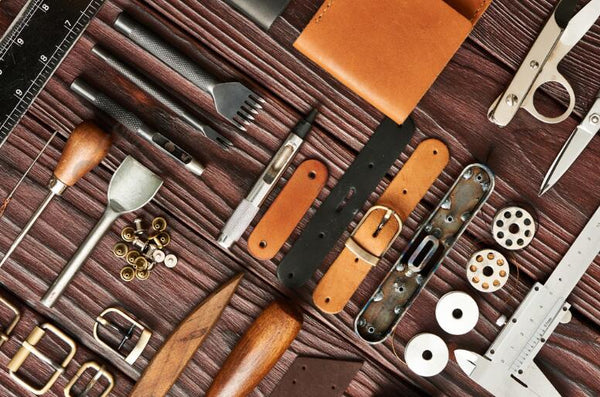
When working with Leather, one may utilize various tools and techniques. Some are very specific, while others cover a wide range of topics. When it comes to leatherworking, certain tools are more versatile than others. Here are some beginner leather working tools:
Leather awl hafts are handles that may be attached to various awl blades.
This lets you have one handle with several blades instead of the many different awls on your desk.
Curved awls are quite handy to sew together rounded or curved pieces of Leather (compared to flat leather pieces). Curved awls make a hole that more closely matches the curve of the end stitch. This is useful for joining two parts over a curved surface, making the stitches tighter and giving you more control over everything.
Most of the time, seat makers use these. Collar awls have a sharp cutting edge at the end of a long, 8′′–10′′ tang. They form a hole in the Leather, which allows you to draw or push the stronger thread through the opening. Because these typically create larger openings in ticker leather, their length provides the necessary force to simplify the task.
These burnishers are often the least expensive option. Keep an eye on them since they may heat up rapidly. If you burnish the edge of the Leather too quickly or with too much heat, you may damage the Leather.
Burnishers crafted from brass and other metals are durable and retain heat quite well. Care must be used while using metal to avoid burning the Leather's edge, which would create unattractive lines. Although metal burnishers tend to be heavier than their wooden and plastic counterparts, this is usually fine when mounted on a burnishing machine or rotary tool.
The most well-known burnishers for Leather are crafted from wood since this material complements Leather's inherent beauty. The natural wood finish prevents the slick Leather from heating up too quickly and softens sharp corners.
When burnishing, sometimes it helps to wet the leather or leather edge first. Not so wet that they are soaked, but just enough to allow the burnishers to heat and smooth the surface. In this scenario, a regular spray bottle of water can serve as an effective instrument for dealing with Leather. The maker can mist the leather areas and then start burnishing.
When dealing with Leather, the most crucial instrument is a knife. So many different versions are used in so many different ways. Sometimes, a knife might be the only tool needed for a leather craft job.
This is a hand-held knife with metal blades that can be switched out. The blades come in a broad range of sizes, shapes, and angles to meet almost any demand for cutting or crafting. The new blades are very sharp, work well, and cost less. To change an edge, unscrew the knife's base, remove the old blade, put in a new one, and screw the base back on. When working with Leather, Xacto tools and blades come in very handy.
Cut-resistant gloves keep your hands from getting cut when you work with or near sharp knives. Materials, production methods, and desired level of protection all play a role in determining a product's status of cut resistance.
A machine might be helpful when removing straps in bulk or doing the same task repeatedly. There are versions that you turn by hand and versions that are driven by electricity.
Scissors typically have uniformly sized finger holes that are less than 6 inches long and may either be hung above the workspace or laid down flat. The blades of most leather-cutting shears are rather strong, making short work of both thin and thick Leather.
The majority of shears are above 6 inches in length and include many sizes of finger holes. One slot is bigger than the others, so fitting all four fingers into it is simpler. The tiny opening is just right for the thumb. Some shears include a built-in resting place on the material, allowing for regular cuts.
When working with Leather, the glue may be a helpful tool, but if you leave it out in the open while you work, it tends to dry up quickly. A glue pot is a tiny plastic container that is airtight for storing glue and sealants. A useful technique to store glue for an extended period is in glue pots.
A v-gouge will cut a straight line approximately halfway through the cloth when pressed into the Leather, and the depth is often adjusted directly on the cutting instrument. The V-shaped blade is ideal for precisely folding right angles on leather goods like purses, wallets, laptop cases, and travel totes.
A leather stippler is a specialized carving instrument for working with Leather. The end of the instrument is often made of metal and includes several pointed prongs, typically arranged in a circle, and the handle is generally made of wood.
When the points are driven into the Leather, they leave behind a pattern of pointed impressions. You can keep pushing, which is a way to add depth to the background of a leather carving. The leather stippler can be a useful leather-making tool to give a cut piece a stippled or pointed look and feel.
An electric pen-shaped instrument, a leather pyrography tool, is used to create Leather patterns. Typically, it consists of a hilt with a protruding metal component that may be fitted with a flame-producing point. The nozzles are interchangeable. The pyrography tool's tip will become heated when plugged in. When heated, it may be used to mark Leather with various designs permanently. Because of the angles, burning designs, rituals, or even text into Leather is simple.
The blades' cutting edge is sharpened using aluminium oxide, a combination of aluminium and oxide. Leather bumpers support its base, and it may be possible to sharpen and polish the edge by rubbing this substance into the leather strop.
The flesh side of a piece of Leather should be coated with the jeweller's rouge to be used as a sharpening strop. The strop may polish and restore the edge of knives and other cutting implements. The better they are maintained, the better they will perform when needed.
You can use the following methods on something as small as a keychain or as big as a backpack. Once you understand these skills, building on basic skills and using them to make more complex projects is easy.
How to glue Leather:
Using glue made just for Leather and suede to stick together multiple leather pieces is usually a straightforward process. When working with leather glue, ensure you are in a room with good airflow. For the best results, you should roughen or scratch the two surfaces that will be sealed together, especially if they are very smooth.
Make sure the Leather is dry and clean before applying the glue. When you put on the glue, use an even-thin layer of clay. Join the two pieces together, and press hard on the glue while the glue is setting. Please don't touch it for at least three hours so that the link can form.
The Leather for casings:
Adding water to veg-tanned Leather to soften the fibres is called "casing." Veg-tanned Leather is in its natural, unprocessed state, which makes it easy to mould, stamp, and shape.
Stitching Leather on the saddle:
The saddle stitch is an effective technique for hand-sewing two Leather pieces together to form a single piece. To complete a saddle stitch, you will want two harness needles and a length of waxed thread. Because the whole line passes through both layers of Leather twice for each stitch, the finished product is robust and reliable.
Leather dying:
Leather can be painted any color, but veg-tanned Leather works best with this method. You can use sheep hair to spread your Dye. Use a lot of thin coats of color if you want a smooth, even finish. If you wish for an odd, textural look, put on a few thick coats of Dye.
Several different colors of Dye are available. Colors made with a spirit base may penetrate the Leather effectively. They are the most effective tool for giving your work a rough and uneven appearance.
But spirit-based paints are more challenging to find than other kinds, and you can't buy them or send them to California. Spirit-based colors can't be sold in California, but acetone-based dyes can. They work well, but they disappear quickly. Make sure to work rapidly and tightly seal the bottles.
Dye made from water works more like paint. They will stay on the top and not go very deep. Most colors are available in water-based dyes and are the only way to get good effects. These paints are great for projects that don't get bent or folded a lot and don't get out in the weather much.
When you burnish Leather:
Rough edges can be made smooth by burnishing the Leather. Although it could take a while, the finished goods are always nice and clean. Start by beveling the edge and rubbing it with a wet cloth before you bevel it. Use a slicking wheel or stick to polish the edge until it looks shiny and smooth.
Passing over Leather:
When Leather is skived, it becomes thinner, which makes it simpler to fold, bend, and conceal joints in the finished product. A piece of machinery made of metal known as a leather skiver is used to shave off very thin layers of Leather from the surface. In most cases, it endows the leatherwork with a more refined overall appearance.
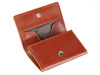
1. The Leather card case and wallet set:
Making a leather wallet from this kit is a fun and easy way to become acquainted with the material. This kit is ideal for beginners because the Leather is pre-cut, and there are holes for sewing. This means that you may begin sewing as soon as it arrives. Badalassi Carlo Pueblo leather, known for its exceptional quality and weathered appearance, was used to craft the kit. You may even have your initials or a symbol engraved in shiny gold or silver on your wallet.
2. The Miniature leather bag kit
Please do it for yourself or a friend to make this adorable bag. You won't need specialized equipment to do this task since the holes and pieces have already been cut. The project does not include any paints, and you may express your creative side with only some acrylic paints or any media you like.
3. Toddler Leather: How to Make a Miniature Leather Bag.
This set is an excellent investment if you're interested in honing your leatherworking abilities. You can learn how to hand stitch, polish the edges, and put together a gusset with this lovely kit, and you'll end up with a bag you'll want to use every day. Everything you'll need to get started is in the package; you can even find in-depth instructions. A lighter and some water are the only other necessities. This kit may be tailored to your taste by letting you choose the kind of Leather and thread color.
4. How to construct a set of leather coasters
These high-quality leather coasters are perfect for crafting a one-of-a-kind masterpiece. The Leather may be stamped with up to seven letters, and you can choose between two stunning hues.
These are fantastic and perfect for giving as gifts at weddings, birthdays, and other celebrations. Everything you need to make the coasters, plus materials to create a leather keychain, is included in this high-quality kit.
5. The Custom Leather Notebook
A quality leather notepad is an investment that will last a lifetime, and a handmade leather notepad is much more precious. With this user-friendly kit, anybody can manufacture professional-quality leather crafts with the help of accessible online video tutorials. You've gained valuable experience working with Leather and are now ready to move on to your next project.
A simple card wallet is a good first project for learning to work with Leather because it shows the basics of cutting, case, dying, stitching, beveling, and burnishing. As you make bigger projects, your leatherworking skills tend to build on each other. Easy leather goods for novices to work with include things like pet collars, keychains, and belts. After completing a simple activity, you can use the abilities you have gained to produce something more complex, such as a strap, a bag, or even a football.
What do you term the process of working with leather?
Leatherworking, often known as "leather crafting," is the process of transforming leather into usable products or works of art by way of shape, dyeing, cutting, stamping, and creating.
What do you need to start working with Leather?
You will need a knife, glue, needle and thread, diamond chisels, a hammer, and a measure for even the simplest of chores. Whatever it is that you want to create, you will need to add something to that list.
What are some other types of leatherwork that may be found?
The process of manufacturing items out of leather, such as dying, painting, carving, stamping, moulding/shaping, laser cutting/etching, perforation, and pyrography, may be considered a work in and of itself.
How much money can be made in the leatherworking industry?
A leatherworker's hourly salaries range from $163 to $212 on average, with an average hourly salary of $185.
Shop our collection of:
Leather Journal Covers | Leather Pen Cases | Leather Teacher Bags | School Tote Bags | Brown Leather Bags | Black Leather Bags | Vintage Briefcases
Related Posts: