My Cart
0
$0.00
Your cart is currently empty
Is it possible to fix a cracked piece of leather? As leather specialists, it's one of the most commonly requested questions. Depending on the sort of damage, the reaction will vary, but the repair will always perform miracles.
Of all, nothing compares to the allure and refinement of real leather, and the last thing you want to see is your beloved purse or briefcase gradually losing its luster. Follow this advice for keeping your hide looking newer for longer whether you have cracked leather that needs to be repaired or just wants to keep it looking newer for longer.
Leather is formed from the skin of animals, as you may know. The skin of the animal will remain smooth and supple while it is alive because natural oils will be supplied regularly, but when the animal's skin is changed into leather, water, and natural oils will be replaced by tanning chemicals. Lubricating oils and waxes aid in the preservation of the leather's beauty and elasticity. Leather may be tanned in a variety of ways. It is environmentally good to use natural vegetable tanning methods, and vegetable-tanned leathers are undoubtedly the most durable leather variety available. Let’s have a look at quick ways to repair cracked leather:
It's vital to grasp some science underlying the skin before we get into how to patch cracked leather. Leather, like any other natural material, wears out and degrades over time. By definition, it's animal skin, which can crack and dry out.
When leather splits, minute changes in the material cause it to split: leather is made up of many small interwoven threads packed firmly together, with denser linked fibers at the surface and looser connected fibers farther in. When these fibers dry out, they cause chafing and a worn look.
If you have dry skin, you know that a lack of water and oils in the upper layers of the skin causes rough, dry spots. Leather is no different. Similarly, if you don't moisturize your skin for a long time, your skin will get more damaged. Due to moisture loss, the packed fibers in the leather might continually scrape against one another as it bends and moves. These fibers grow hard and tight with time, causing fractures at the stress point. Animal skin is used to make leather, which can dry up and break over time.
Because the fibers - the leather's basic structure – have been broken, cracks are by definition permanent. But the news isn't all negative. The good news is that many cracks may be easily concealed – and rapidly repaired – by applying leather conditioners to rebuild the fibers around the broken leather.
If you detect cracks on your leather, a fast inspection can determine if they are small surface cracks that are readily treated or deep cracks that are more difficult to cure but may be fixed with leather crack filler, coloring, and nourishing treatments. Continue reading to learn how to care for dry leather and how to repair cracked leather.
Clean the surface of the fissures and surrounding leather using a smooth, dry brush or cloth to remove any debris or dust. Then, using a shoe dauber (or any small, fine-bristled brush), carefully wipe the leather cracks with leather cleaner or saddle soap. The cracked leather surface should be soft and flexible enough to progress to the next step after cleaning with saddle soap, which contains mild soap and softeners.
You can use a cracked leather repair product at this stage, but we recommend dabbing the cracking areas with mink or neatsfoot oil. With mild pressure, work the oil into and over the fissures. A rag or even the back of a spoon might be used for this. Apply to the cracked surface until the cracks are no longer visible. With a soft cloth, wipe away any extra oil. (First, try the oil in an inconspicuous location to determine whether it affects the color of the leather.)
You may be happy with the softer appearance and texture of the cracked regions at this point, but don't forget to use a soft cloth to apply a leather conditioner to the treated area as well as the surrounding leather surface. Apply conditioner to the entire bag once a month to keep it in good shape and prevent additional drying and cracking.
It's a lot simpler to read about how to repair broken leather than it is to do it. Any cleanser, repair chemical, oils, or conditioner you want to use should be tested on a tiny area first. Also, kudos on your attempts to resurrect the broken leather.
In a nutshell, the best cure is to avoid it. When you get your item, keep it away from direct sunshine and heat, and avoid keeping it in extremely dry regions. When it comes to leather care, investing in a good conditioner is crucial since it keeps the skin from drying out and splitting.
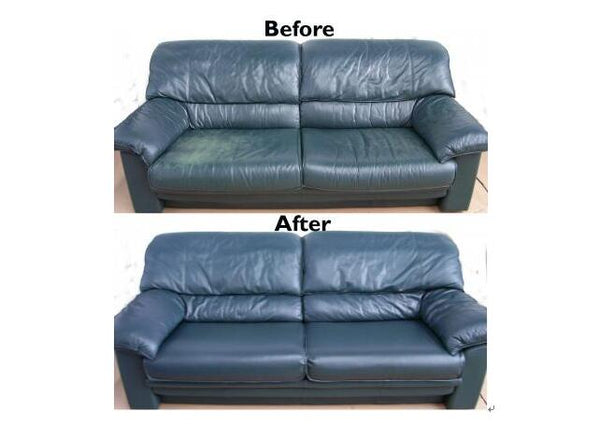
And, if the worst happens, remember that cracked leather may be repaired using a variety of techniques. Treating daily is the golden guideline. With a little time and care, your cherished leather will turn heads for seasons to come.
You can use this rehydrating method by following the below-mentioned steps:
Allow the leather to dry before applying any treatments.
Apply a heavy-duty leather conditioner to the fissures.
Choose a bottled conditioner that is designed to rehydrate and rejuvenate leather. Apply a tiny amount of conditioner on your fingertip or a soft applicator such as a sponge or towel. Then, directly into the crevices, massage the conditioner to clean the fabric's pores and prepare it for deeper conditioning.
Apply more conditioner to the cracked areas to smooth them out.
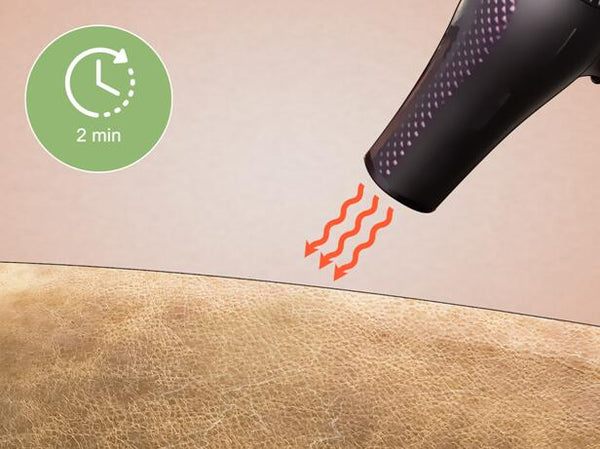
Allow for a 2-hour rest period, or until the leather feels dry to the touch.
The suggested drying time should be found in the manufacturer's instructions. The leather will require a significant amount of time to absorb all of the conditioners. Before continuing to treat it, wait until it feels dry to the touch.
Allow the leather to dry overnight if you have the time. Waiting a few minutes longer allows the conditioner to fully rehydrate the leather.
If the fractures are still apparent, condition the leather again.
You may need to treat the leather many times depending on the conditioner. Using an applicator pad, apply extra conditioner to the cracks and scrub it in. After allowing plenty of time for the leather to dry, check it again the next morning.
Continue treating the leather until the fissures are gone or the conditioner is no longer absorbed. If the conditioner stops working but the fissures remain visible, you'll need to use a filler or color.
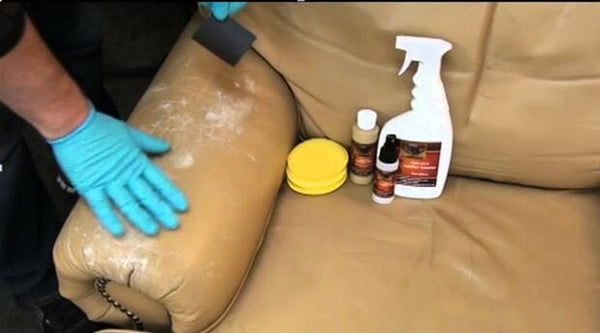
Soap or a leather cleaner can be used to remove dirt from the leather. Use a mild soap or a bottled specialist leather cleaner. Leather is suitable to use with baby soaps and mild dish and hand soaps. Make sure the soap isn't intended for use on rough or greasy surfaces. Wipe any filth and debris left on the leather with the cleaner and a microfiber towel. If you're going to use soap, make sure you dissolve it in distilled water first. Then, using the soapy water, softly dampen a cloth.
Allow the leather to dry completely overnight.
If there is any moisture on the leather, the filler will not settle into the fissures. Wipe the leather down with a clean microfiber towel to help it dry faster. Before attempting to fix the scratches, make sure the leather is clean and dry to the touch.
With a piece of 600-grit very fine sandpaper, smooth up the fissures.
While treating the cracks, use mild pressure. Continue to wear them down until the leather is completely smooth to the touch. Then, using a dry microfiber towel, wipe it away. To fill in the crevices, make sure the dust is removed completely using the towel.
It is safe to use higher grit or ultrafine sandpaper, but avoid using harsher sandpapers. Lower-grit sheets are rougher and more prone to leave scratches visible.
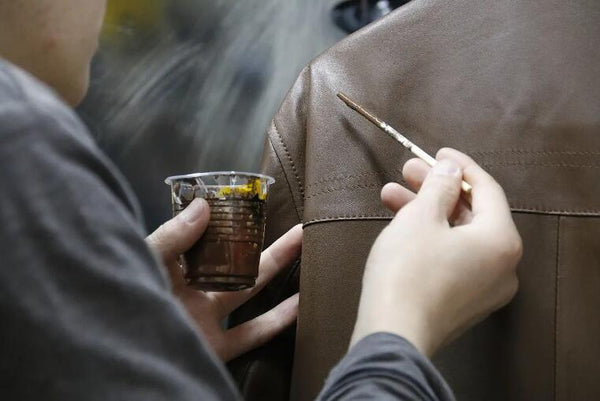
Fill the cracks with leather filler.
Fillers for leather come in tiny containers and are paste-like. With a palette knife, pick up some paste and brush it into the cracks to cover them with a thin layer of paste. Apply more paste until the cracks are filled.
To smooth out the cracks, apply extra coats of filler as needed.
Because the filler shrinks as it dries, you'll need to add another coat. Using a palette knife or another blunt tool, apply more filler. Scrape away any excess, then let the fresh coat dry. The cracks will be undetectable once the leather has been mended.
You may need to apply several coats of filler depending on how deep the fractures are. Some cracks require up to five coats. Rep the procedure until the cracks are filled.
There are a few things you can do to keep your valuable leather products safe. To begin, keep them out of direct sunshine and intense heat. Apply a decent conditioner to your leather once a month. These simple procedures should keep your skin from drying out and peeling. If damage does occur, treat the fractures using the techniques mentioned above for cracked leather repair.
Shop our collection of:
Personalized Leather Padfolios | Engraved Leather Journals | Leather Backpack | Canvas Backpack | Leather Bags For Men | Canvas Bags For Men | Leather Bags For Women | Canvas Bags For Women
Related Posts: